
There are many ways to teach problem solving to elementary students. Most students are successful with a well structured problem solving plan. However, we all have at least a few students who just don’t “get it” with regular classroom lessons. Working one on one or in small groups and applying well planned interventions helps these students find success. Last week I shared my first three top tips and today I am sharing the next three tips:
 Some students understand the questions just fine, but have trouble seeing the big picture, the story or the scenario. These students need extra help laying out the details. Most students will benefit from instruction in drawing pictures or making diagrams, and struggling students will especially need to practice with this. I like to teach my students how to make part-part-whole and whole-part-part models.
We will discuss each clue and label it as a part or the whole and then work from there. Strip diagrams and unit bars work well too. I also like to encourage students to make actual pictures of the clues. I am no artist and the kids like to laugh at my drawings with me!

 This is so important for students who have trouble visualizing the actions in the problem. An example could be using this problem below with Martina and her purse. I will get play money out and we will actually act out the story with the play money. Another example could be to use colored counters with the apple story below. Now there are some big numbers so you could use smaller numbers to practice acting it out and then transfer the actions to your paper with the larger numbers.

 Sometimes students get caught up by the big numbers and can’t focus on the actions in the problem. For these students you can cross out the big numbers, substitute with smaller numbers and have them solve. Then apply the actions to the bigger numbers. If needed, use manipulatives to help build understanding.
Missed Part 1 from last week? Find it here:


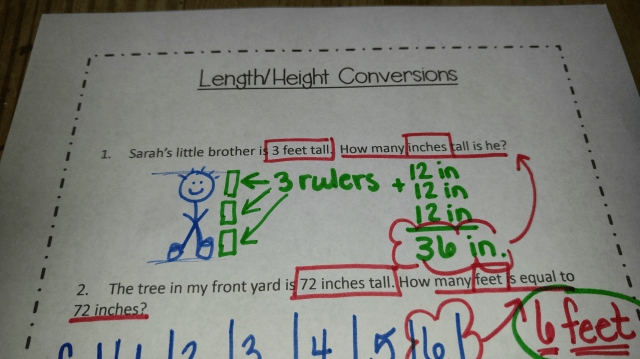 Measurement conversions can be quite overwhelming for some students! This is especially true if they do not understand the relationship between the different units of measurement. Notice I use the word “understand”, not the word “know”. Students can know that 1 foot is 12 inches with out really understanding how they are equal to each other. Below are suggestions for building understanding so that student can be successful with measurement conversions.
